A free pattern by Megan Mills (c) 2018.
|
|
|
Materials:
Scraps of red and black double knitting (8-ply) wool yarn
1 pr 3.5 mm needles (this is smaller than usually recommended so the poppy won't be floppy)
Wool darning needle to sew the small seam and weave in ends
Scissors
Size: Approx 5 cm across (when sitting in its finished, slightly cupped, shape)
Time: Approximately 20 minutes to knit and another 10 minutes to finish. You may be a bit slower to start with, but after a couple you will get much faster.
| Abbreviations: | |
| K | knit |
| P | purl |
| K2T | knit two together (a right-leaning single decrease) |
| P2T | Purl 2 together |
Tip: Leave all tails about 15cm long so you can use them for finishing.
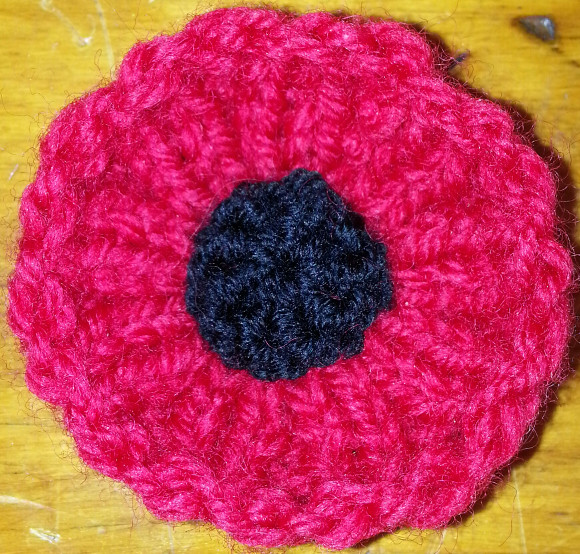
Ribbed petals
With red loosely cast on 36 stitches.
Rows 1 to 6: (K2, P2) to end.
Break off yarn.
Black "button" centre
Row 1: K2T across the row. (You now have 18 sts)
Row 2: K.
Row 3: P2T across the row, break off yarn. (You now have 9 sts)
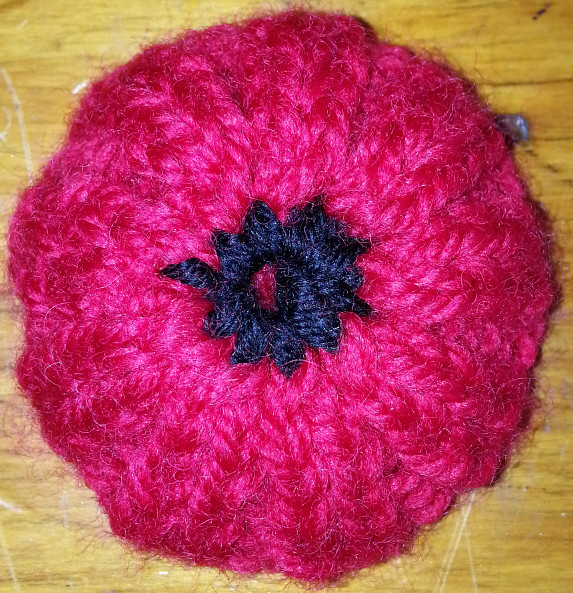
Overall finishing
Thread last tail on needle and, starting from the opposite end of the row to where the tail is, run it through all 9 sts on the needle twice so you can draw the centre up into a ring. Use the remainder of the tail to seam just the black side seam of the poppy closed. End with the tail on the back of the poppy.
Now you will have two black tails beside each other and a ring of black on the back of the poppy from the row where you changed colour. If necessary adjust the size of your first black stitch from when you changed colours. Weave each tail, in opposite directions around that ring, taking the tails through all the little black loops.
When they meet on the opposite side of the ring continue weaving so the tails meet back at the beginning of the ring. Tie them together very tightly, pulling the black centre into a "button" on the front of the poppy. Trim the tails, leaving them long enough to hide away in the centre button. Alternatively you can leave them long and take one tail to the other side of the centre at the back and leave the tails for attaching the poppy to something.
Now use the red tail from the cast-on edge to sew a tiny seam from the outside edge towards the centre of the poppy. When you get to the black centre the two red tails will be beside each other. If necessary adjust the size of your last red stitch from when you changed colours. Tie the red tails together if you wish before you continue to tidy them away and trim them. I take them towards the centre button and hide these ends in there too. As with the black tails, you may choose to leave these tails so they can be used to attach the poppy to something.
Pull the fabric of the poppy a bit to make it lie how you like. It is meant to be slightly cupped.
Note: This page is just the abridged printable instruction page; for more information, instruction, imagery and blurb go to http://megan.cc/Poppy/